Gluten Free Bread Recipe: Soft, Sliceable, and Worth Making Again
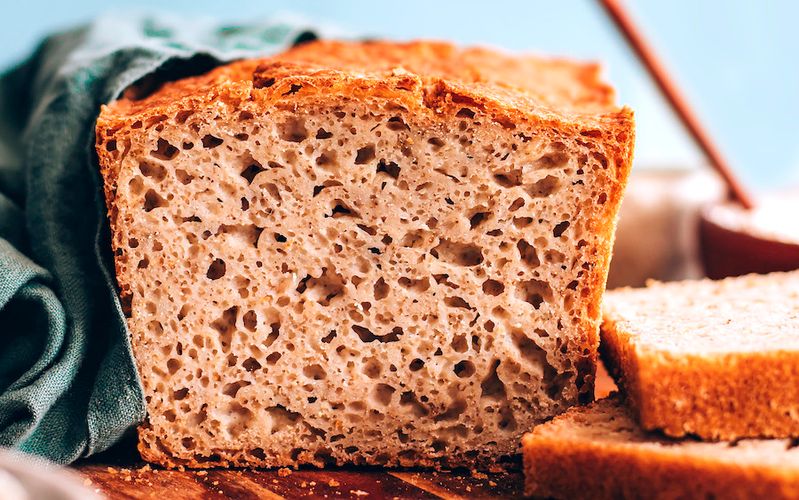
This gluten free bread recipe produces a loaf that actually slices without crumbling — soft crumb, good crust, and no specialty equipment needed.
The most common complaint about a gluten free bread recipe isn't that it tastes bad — it's that it collapses in the center, turns to crumbs the moment a knife touches it, or comes out so dense it could double as a doorstop. All three failures are fixable, and all three trace back to the same set of variables: flour blend, binder choice, and hydration. This guide covers the yeast-risen version for the best texture, the no-yeast version for beginners who want a reliable starting point, the xanthan-free approach for anyone avoiding gums, and the specific sandwich bread format that stays soft enough to slice thin and hold together under fillings.
What Makes Gluten Free Bread Hard to Get Right
In wheat bread, gluten is the protein structure that forms when flour and water are mixed and worked. It traps the carbon dioxide released by yeast, stretches as the gas expands, and produces a loaf with a light, open crumb and a cohesive slice that holds together. Gluten free baking has none of this network to work with. The replacement toolkit — starches, binders, and careful hydration — can produce something that behaves similarly during baking, but it requires much more precision than wheat bread does, because there's no forgiving elastic network to compensate for small errors.
Most GF loaves fail for one of three reasons: the flour blend lacks the right combination of structure and stretch, the dough is under-hydrated (GF doughs need considerably more water than wheat doughs to produce a workable consistency), or the oven temperature is too high and sets the crust before the interior has finished rising. Understanding which failure a specific loaf shows is the fastest way to fix it.
Choosing the Flour Blend — The Foundation of Any Gluten Free Bread Recipe
Flour selection is the most consequential decision in how to make gluten free bread at home, because no amount of good technique compensates for a single-ingredient flour that simply doesn't behave like wheat in a yeast-leavened context.
Rice Flour + Tapioca + Potato Starch
A blend of white rice flour, tapioca starch, and potato starch is the closest structural equivalent to wheat flour in homemade bread. Rice flour provides the backbone — it's the protein-and-starch combination closest to wheat in behavior. Tapioca starch adds stretch and helps the crumb stay cohesive rather than crumbly. Potato starch contributes moisture retention and tenderness, which is part of why loaves made with it stay softer for longer than rice-flour-only versions.
Using a Pre-Blended 1:1 GF Flour
A quality pre-blended gluten free flour with these components already combined is a genuinely valid shortcut, particularly for a first attempt, since it removes the guesswork of getting the ratios right. The caveat: brands vary significantly in their tapioca and starch ratios, and some include bean flours (chickpea, fava) that add bitterness to a bread. Check the label and choose a blend made primarily from rice flour and clean starches. This same flour works across multiple formats — the gluten free pizza crust recipe on this site uses the same flour blend and binder logic as this bread, which means one bag of pre-blended flour covers both recipes.
Binders — Xanthan Gum vs. Psyllium Husk in Bread
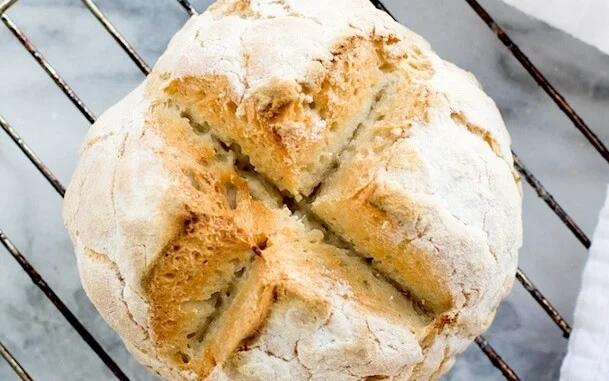
The binder choice in a yeast-risen bread dough matters differently than it does in pizza crust, because the dough needs to stretch slowly over 45–60 minutes of fermentation — not just hold together long enough to be pressed flat and baked in 12 minutes.
Why Psyllium Husk Works Better for Yeast Bread
Psyllium husk forms a gel when hydrated that has a slow, flexible stretch — it expands with the gas produced by yeast rather than resisting it the way a purely gum-based binder can. The result is a crumb with a more open structure than xanthan gum alone produces in a yeast context. Use 1 tablespoon of ground psyllium husk per 2 cups (280g) of GF flour in a yeast bread recipe as the starting ratio.
Combining Both
Many reliable GF bread formulas use a small amount of both: xanthan gum provides immediate binding that holds the dough together in the loaf pan before baking, while psyllium husk handles the flexibility needed during the rise. A working combination: ½ teaspoon xanthan gum plus 1 tablespoon psyllium husk per 2 cups of flour. This is one of the more tested gluten free baking ingredients combinations for loaf bread specifically.
Easy Gluten Free Bread Recipe — The Yeast Version
A standard easy gluten free bread recipe for a 9x5-inch (23x13cm) loaf: 2 cups (280g) 1:1 GF flour blend, 1 tablespoon ground psyllium husk, ½ teaspoon xanthan gum (skip if the blend already contains it), 1 teaspoon instant yeast, 1 teaspoon sugar, 1 teaspoon salt, 1 cup (240ml) warm water (around 38°C/100°F), 2 tablespoons (30ml) olive oil, 1 large egg, and 1 teaspoon apple cider vinegar. Bloom the yeast in the warm water with the sugar for 5 minutes until it foams. Mix all dry ingredients, then add the yeast mixture, egg, oil, and vinegar. Beat with a spoon or hand mixer for 2 minutes — the dough will look more like a thick batter than a traditional bread dough, and that's correct.
The Rest Period (Not a Knead)
Transfer the bread dough directly into a greased loaf pan and smooth the top with a wet spatula. Cover with a damp cloth and leave to rise in a warm place for 45–60 minutes. GF dough doesn't get kneaded — the structure is too fragile and sticky to handle like wheat dough, and working it further breaks down the binder network rather than strengthening it. The rise won't look like a wheat loaf doubling — expect a modest 20–30% puff.
Baking Covered Then Uncovered
Bake at 190°C (375°F). Start with the loaf pan tented loosely with foil for the first 30 minutes — the trapped steam keeps the crust from setting before the interior has finished rising. Remove the foil and bake for another 20–25 minutes until the top is deep golden brown and a skewer inserted in the center comes out clean. Internal temperature of the finished loaf should reach approximately 93°C (200°F) — a reliable indicator of a fully baked interior regardless of how the top looks.
Gluten Free Bread Recipe Without Yeast — The Quick Loaf Version
A gluten free bread recipe without yeast replaces the fermentation step entirely with baking powder and baking soda as leaveners. The method is faster, more predictable, and directly addresses the gluten free bread for beginners use case — because it removes the one variable (yeast fermentation) that introduces the most unpredictability in a first attempt.
The No-Yeast Method
Combine 2 cups (280g) of GF flour blend, 1½ teaspoons baking powder, ½ teaspoon baking soda, ½ teaspoon salt, and 1 tablespoon psyllium husk in one bowl. Whisk 1 cup (240ml) of milk or plant milk, 1 egg, 2 tablespoons oil, and 1 teaspoon apple cider vinegar in another. Pour wet into dry, mix until just combined, transfer immediately to a greased loaf pan, and bake at 180°C (350°F) for 50–60 minutes. No waiting, no proofing, no guesswork.
When No-Yeast Works Better
The no-yeast loaf produces a denser, sturdier result than the yeast version — which is an advantage rather than a compromise for toast-centric use. A slice that holds together under a hot press, doesn't fall apart under a thick spread of peanut butter or avocado, and browns evenly in a toaster. For anyone making this primarily for morning toast, the no-yeast version often outperforms the yeast version in practical everyday use.
Gluten Free Bread Recipe Without Xanthan Gum
A gluten free bread recipe without xanthan gum is straightforward when psyllium husk takes over as the sole binder — but the ratio needs to increase to compensate. Use 1½ tablespoons of ground psyllium husk per 2 cups of GF flour rather than the 1 tablespoon used in the combination formula. The finished loaf has a slightly denser, chewier crumb than an xanthan-containing version, and a slightly more rustic crust, but it holds together well and slices cleanly once fully cooled. Avoid whole psyllium husk (the husks rather than the powder) in bread — the powder integrates more completely and produces a more even texture throughout the loaf.
Soft Gluten Free Sandwich Bread — What Changes
The gluten free sandwich bread recipe use case adds one more requirement beyond basic slice-ability: the loaf needs to stay soft enough at room temperature for 2–3 days to be practical as a daily lunch bread. Standard GF loaves harden quickly because the starches in GF flour retrogrades (recrystallize) faster than wheat starch does after baking. Three adjustments that address this in the soft gluten free bread recipe format: include a full egg plus one extra egg white (the additional protein helps retain moisture); add ½ tablespoon of olive oil or melted butter more than the base recipe calls for; and store the completely cooled loaf in a sealed zip bag with a small square of paper towel inside to manage condensation without drying out. Serve alongside something spreadable — this hummus recipe is naturally gluten-free and makes a practical everyday sandwich filling alongside a homemade bread loaf like this one.
Gluten Free Bread Methods at a Glance
This gluten free bread recipe comparison helps match the method to the specific situation — available time, texture priority, and whether fermentation is on the table.
| Method | Leavener | Rise Time | Texture | Best For |
|---|---|---|---|---|
| Yeast-risen (standard) | Instant yeast | 45–60 min | Lightest, most bread-like | Everyday bread, sandwiches |
| No-yeast (quick loaf) | Baking powder/soda | None | Denser, sturdier | Toast, beginners |
| No xanthan gum | Psyllium husk only | 45–60 min | Slightly denser, chewy | Xanthan-sensitive |
| Sandwich bread (soft) | Yeast | 45–60 min | Soft, sliceable | Packed lunches, spreads |
Tips for Gluten Free Bread That Actually Works
Always use a loaf pan — GF dough has no structural strength of its own and spreads rather than rises without a pan to contain it. Weigh flour in grams rather than measuring by cups, since GF flour packs into a measuring cup differently each time and the variation is enough to affect the final texture. Let the loaf cool completely on a wire rack before slicing — this cannot be rushed, because cutting into a hot GF loaf causes the interior to collapse and turn gummy even when the loaf was perfectly baked. Store at room temperature for a maximum of 2 days before freezing individual slices, which keeps much better than refrigerating a whole loaf. For more GF-friendly meal ideas beyond bread, browse the full vegetarian recipe collection.
FAQ
What is the best flour for gluten free bread?
A blend of rice flour, tapioca starch, and potato starch — or a pre-blended 1:1 GF all-purpose flour with these components — produces the lightest, most bread-like result. Almond flour or coconut flour alone tend to produce very dense loaves. Check the blend label and avoid brands with a high bean-flour content, which adds bitterness.
Why does my gluten free bread sink in the middle?
Sinking almost always means the interior didn't bake through before the crust set. This happens from baking at too high a temperature, from over-proofing the dough (yeast version), or from using too much liquid. Lower the oven temperature by 10°C (20°F), reduce liquid by 2 tablespoons, and extend the bake time rather than the temperature.
Can you make gluten free bread without xanthan gum?
Yes — psyllium husk is the most effective substitute in bread, since it forms a gel that stretches during fermentation in a way xanthan alone doesn't. Use 1 tablespoon of ground psyllium husk per 2 cups of GF flour. Expect a slightly denser, chewier crumb compared to an xanthan-containing loaf.
How long does homemade gluten free bread last?
At room temperature in an airtight container, most gluten free loaves stay fresh for 2–3 days before drying out noticeably. For longer storage, slice the completely cooled loaf, wrap slices individually, and freeze for up to 2 months. Toast from frozen directly rather than thawing first for the best texture.
Does gluten free bread need to rise like regular bread?
Yeast-based GF bread benefits from a rise period — typically 45–60 minutes in the loaf pan — but it won't look like wheat dough doubling in size. Expect a modest puff of about 20–30%. Over-rising (longer than 90 minutes) causes the structure to weaken and the loaf to collapse during baking.
The practical hierarchy for a gluten free bread recipe that works on the first or second attempt: flour blend first, psyllium husk as the primary binder in any yeast version, and complete cooling before the knife comes out. Anyone who hasn't made GF bread before should start with the no-yeast version — it removes the fermentation variable entirely and still produces a loaf that toasts well and holds together as a sandwich. The yeast version is worth attempting once that result feels consistent, because the texture difference between the two is significant and the ingredient logic transfers directly from one to the other.
Tags